In this article, we will tell how you can enable Assistive Touch iPhone, iPad & OS 13.
Assistive Touch iPhone is the most excellent highlight of the Accessibility suite. Though it’s created for the people who have trouble touching the screen or need an adaptive accessory, anyone can take benefit of it to carry out several tasks more conveniently. It would be excellent if you could take the screen of your iPhone or iPad or obtain all of your Accessibility features like Zoom, Smart Invert, or VoiceOver with a single tap.
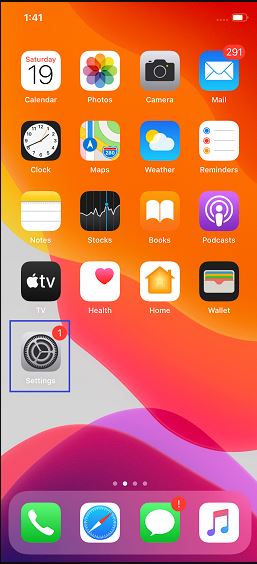
- On your iPad or iPhone, open the “Settings.”
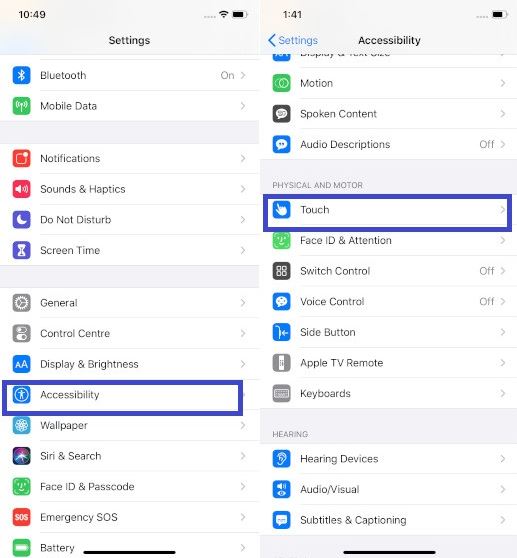
- Now, click on the “Accessibility” and under the PHYSICAL AND MOTOR section, tap on the “Touch” option.
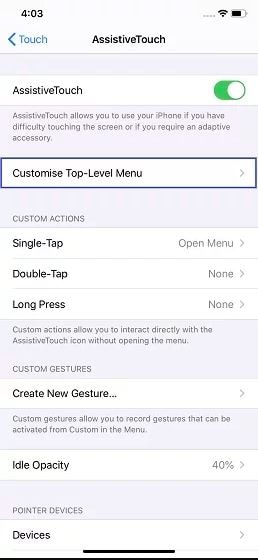
- Next, click on the “Assistive Touch” and to enable it to turn on the switch.
Now, a small grey Assistive Touch button will seem on the screen. You can click on it to access many options like rotating screen, accessing Notification/Control Center, adjusting volume, and much more.
HOW YOU CAN CUSTOMIZE TOP LEVEL MENU SHOWN IN ASSISTIVE TOUCH IPHONE:-
- As you have done steps 1 to 3 above, first follow these 3 steps and then click on the “Customize Top-Level Menu” option.
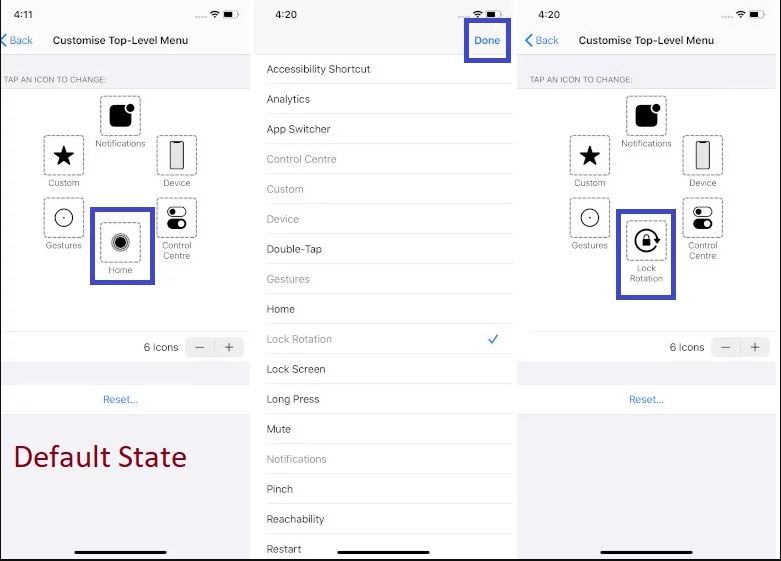
- Now, click on an icon that you want to change and then select the preferred option. In the end, make sure at the top right to confirm to click on Done.
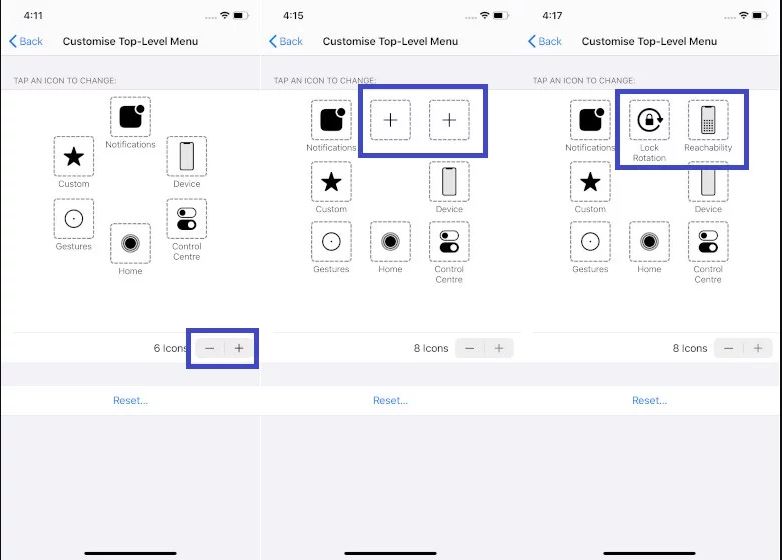
By default, the menu displays six options like Home, Notifications, Device, Control Center, Gestures, and Custom. But you can decrease or increase the number of items you require on the menu.
To increase an item: Click on the “+” button and then click on the empty box and then select the desired option and at the end, select on Done.
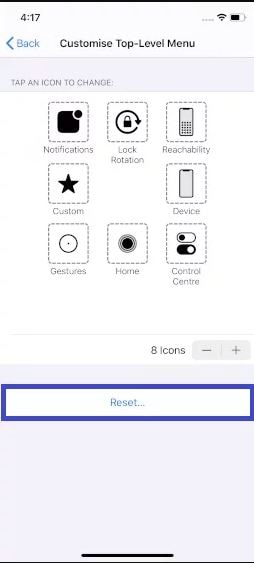
Reset Assistive Touch iPhone Menu: If you regularly see the Assistive Touch iPhone menu messed up, then to put it to the default state, click on the Reset button.
Also read: How You Can Perform Windows 10 Password Reset


